Amazing 18 Gmail settings that will change how you think about your inbox
Make your inbox more efficient and effective with these easily overlooked options.
By JR Raphael
When it comes to managing email, you need every advantage you can get.
Google
recognizes this. The company has packed Gmail with dozens of advanced
options that can save you time and add powerful possibilities into your
inbox. The only problem is that there are so many of them—scattered
across so many places—that it’s all too easy to overlook something
useful.
Not to fear, though: I dug through every nook and cranny
to uncover Gmail’s most valuable out-of-the-way settings. These
next-level options go beyond the broadly known basics and have the
potential to reshape how you handle your email. Some of them are
specific to the new Gmail design,
while others apply to both the new and classic versions of the site.
(And most of them are relevant primarily for the desktop Gmail site, by
the way—as opposed to the mobile apps—with just a couple of noted
exceptions.)
So fire up your brain’s memory banks: It’s time to crank up your inbox IQ.
Composing messages
1. Gmail’s new Smart Compose feature can save you precious time by predicting what you’re going to write before you write it—kind
of like autocomplete for your inbox. It works surprisingly well, too,
and it’s easy to ignore when its suggestions aren’t spot-on.
Smart Compose is like autocomplete for your inbox.To
try it out, you’ll first need to turn on the “Enable experimental
access” option within the General tab of the new Gmail’s settings. After
you click the “Save Changes” button at the bottom of the screen, Gmail
will refresh itself—and Smart Compose should then automatically be
activated. You can confirm by going back into the General tab of the
settings and looking for the newly added Smart Compose option. As long
as “Writing suggestions on” is checked, you’re all set—and you should
see Google’s predictive text show up periodically as you write new
emails.
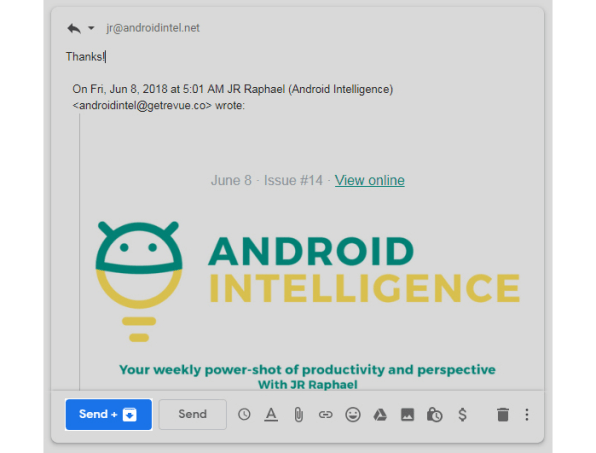
2. Speaking of saving time, do yourself a favor and head
into the Advanced section of the new Gmail settings (or the Labs section
in classic Gmail) and enable “Canned Responses.” Once you do, you’ll be
able to create simple templates that can then be inserted into messages with a couple of clicks.
3.
The new Gmail’s snooze option is spectacular—but its default snooze
times may or may not be ideal for your own personal schedule. Here’s a
little secret, though: You can customize exactly what time Gmail considers to be “morning,” “afternoon,” and “evening” by looking in the settings of Google Keep
(obviously, right?). Just change the default times for each day-part
within Keep’s settings, and the same times will then carry over to
Gmail—both on the website and within the mobile app.
4. By default, Gmail gives you a small window in the corner of the screen for composing new messages. If you’d rather write in a centered and more full-screen field, you can click the small diagonal arrow in the window’s upper-right corner to change its size and placement. And if you always want
to write in a full-screen window, there’s a setting to adjust Gmail’s
default behavior: Click the three-dot menu icon in the compose window,
then select “Default to full-screen.” That’ll make all your future
emails start in that large, centered view.
5. If you’re anything
like me, you probably archive messages immediately after responding more
often than not. Save yourself a step and switch on Gmail’s optional
“Send & Archive” button, which combines sending and archiving into a single command. (It doesn’t replace the regular “Send” button; it just appears as an extra button alongside it.)
The “Send & Archive” button combines two steps into oneYou
can activate it by looking for the “Send and Archive” option in the
General section of Gmail’s settings. Select “Show ‘Send & Archive’
button in reply” and then hit the “Save Changes” button at the bottom of
the page.
6. Gmail’s “Undo Send” feature can be a real lifesaver,
but its default cancellation window of five measly seconds doesn’t give
you much time to change your mind. Head into the General section of
Gmail’s settings and click the dropdown box next to the “Undo Send”
option. You can bump the value up to 10, 20, or even 30 seconds—which
means that you can give yourself up to half a minute to have second thoughts about any message you send.
Reading your mail
7.
Not a fan of Gmail’s tabbed inbox? Hover your mouse over “Inbox” in the
left sidebar and click the downward-facing arrow that appears alongside
it. That’ll let you choose from five different inbox configurations:
“Default,” which is the standard tabbed setup; “Important first,” which
splits your inbox in half, with messages Google deems to be important
on top; “Unread first,” which does the same thing but with unread
messages taking up the upper portion of the screen; “Starred first,”
which does exactly what you’d think; and “Priority Inbox,” which lets
you create up to four customizable sections to break apart different
types of messages.
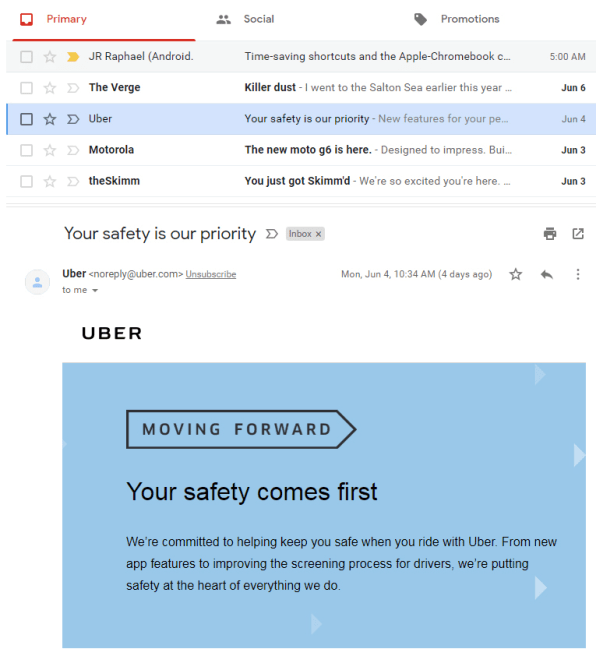
8.
If you’re using the default tabbed inbox configuration, take control of
how it works by looking in the Inbox section of Gmail’s settings.
There, you can simplify things a bit by deactivating tabs you don’t want displayed (which causes messages that would
have been categorized within them to go into the next most appropriate
tab). You can also activate a handy option to have any messages you star
always show up in your “Primary” tab, regardless of where they were
initially sorted.
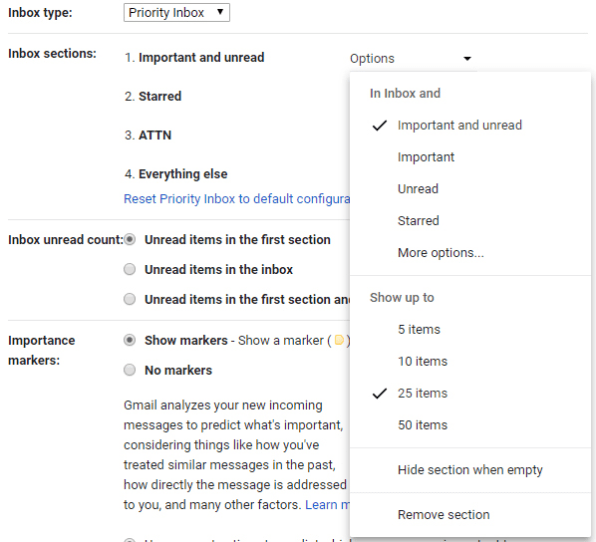
9. If “Priority Inbox” is your cup of tea, head into that same Inbox section of Gmail’s settings to configure your inbox sections in any way your heart desires. The possibilities there are practically endless.
Gmail’s
“Priority Inbox” setting provides the greatest opportunity for
customizing and controlling exactly how your inbox is organized.10. Regardless of which inbox setup you choose, be sure to experiment with Gmail’s density modes to find the inbox display style that works best for you.
Click the gear icon in the site’s upper-right corner. In classic Gmail,
you’ll see options for “Comfortable,” “Cozy,” or “Compact” density
right in that main menu; in the new Gmail, you’ll first need to select
“Display density” and will then see options for “Default,”
“Comfortable,” and “Compact.” Note that “Default” puts the newly added
attachment previews into your inbox view, while “Comfortable” and
“Compact” hide that information.
11. Miss Outlook’s preview pane, where you can read a message while still keeping your inbox in view? Gmail actually offers a similar view that shows everything at once.
Look in the Labs section of classic Gmail’s settings or the Advanced
section of the new Gmail’s settings and enable the option labeled
“Preview Pane.” That’ll put a new four-line icon next to the settings
button in the top-right area of your inbox. Click the downward-facing
arrow next to it, and you can opt to have either a vertical split—in
which any message you select appears to the right of your inbox—or a
horizontal split, in which message previews appear beneath your inbox.
The “Preview Pane” setting lets you view the contents of emails without ever leaving your inbox.Be
sure to look in the General section of Gmail’s settings, too, as an
option there labeled “Preview Pane” will let you control how long you
can keep a message open in the pane before it gets marked as read.
12.
Let’s not kid ourselves: No one likes pagination. Meander back into the
General section of Gmail’s settings and look for the “Maximum page size
option.” You can’t turn off pagination completely, but you canshow up to 100 conversations at a time—and if you have more than that many items still in your inbox, pal, you’ve got bigger problems.
Optimizing and organizing
13.
Gmail’s stars provide a great system for marking important messages—so
why not take things up a notch and give yourself even more ways to designate attention-demanding threads? The “Stars” line the General section of Gmail’s settings lets you add up to 11 additional icons into your list of message-starring possibilities, with options ranging from differently colored stars to exclamation point, question mark, and check mark symbols.
Just
drag and drop whatever icons you want into the “In use” list, and pay
careful attention to the order: It’s the same order in which the icons
will be applied—so if you put a purple star in the second position and
an exclamation point in the third, clicking a message’s star field twice
would assign the purple star to it, while clicking it three times would
give it the exclamation point.
14. Make your inbox more effective by clearing out clutter and leaving only the labels you need.
In the “Labels” section of Gmail’s settings, you’ll find commands to
hide any label or category you don’t regularly access from the label
list—that long and often sprawling list in your inbox’s left sidebar.
You’ll still be able to get to those hidden labels; they’ll just be
tucked away beneath the “More” option and thus out of your way most of
the time, so you can more easily focus and find the ones you use the
most.
15. The Tasks app associated with the new Gmail isn’t integrated into the Google ecosystem terribly well as of now, but you can connect your tasks with your Google Calendar—if you know how: Open up the Google Calendar website. See the “My calendars” section on the left side of the screen? You should see an option within it labeled “Reminders.”
Tap
the three-dot menu icon alongside that line and select “Switch to
Tasks.” Any tasks to which you assign a date within the Gmail Tasks
sidebar or the standalone Tasks mobile app will now automatically appear
in your calendar. Just note that this feature replaces the integration
of regular Google reminders created via Assistant, Keep, or the Google
search box.
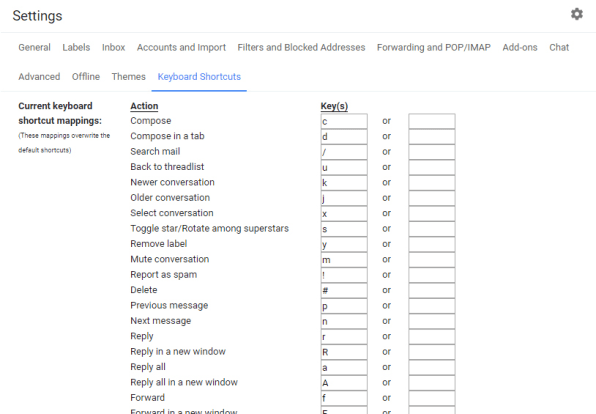
16. You probably know about Gmail’s keyboard
shortcuts, right? (If you don’t, go activate them—right now—in the
General section of Gmail’s settings.) You might not know, however, that
you can create your own custom keyboard shortcuts, too:
Look in the Labs section of classic Gmail or the Advanced section of
the new Gmail to fire up the option, then look for a new Keyboard
Shortcuts section in your settings.
Create custom shortcuts that work for you via Gmail’s “Custom keyboard shortcuts” setting.There,
you can change any of the default keyboard shortcuts or supplement them
with secondary options. One super-useful adjustment I enjoy—inspired by
Google Inbox—is adding the simple shortcut “i” as a faster way to jump directly from anywhere to my inbox.
17.
Whether it’s Uncle Geoffrey or the mailing list that just won’t quit,
there’s always some irritating force that consistently fills your inbox
with irrelevant garbage. Gmail has a buried setting to get annoying missives permanently out of your hair:
While viewing a message, click the three-dot menu icon in its
upper-right corner (directly to the right of the reply icon), then
select the “Block” option. Any emails from that address will
automatically go right into your spam folder from then on—and if you
ever have second thoughts, you can manage your list of blocked addresses
in the Filters and Blocked Addresses section of Gmail’s settings.
18.
Using the new Gmail? Take a moment to set up its offline mode before
you actually need it. Unlike the clunky offline option in the classic
version of Gmail, this offline mode works just like the regular Gmail
website; all you have to do is open the site before you lose your connection. As long as you’re using Chrome 61 or higher, you’ll then be able to look through your messages and compose new emails as if you were online, no Wi-Fi necessary. (Any emails you compose while offline will be kept in a new Outbox folder and then sent as soon as you reconnect.)
The
option resides in the aptly named Offline section of the new Gmail’s
settings. Set it up the way that makes sense for you, be sure to hit
“Save”—and then rest easy knowing that the next time your internet
connection wavers, all your email will still be right there and waiting.